

Blurry photos have just a few causes, and each one has a specific fix. Diagnose first: is the whole photo blurred or just the subject? Is something sharp but the wrong thing? Your answers point straight to the culprit: camera shake, subject movement, missed focus, or too little light. Each one is fixable with a settings change, not new gear.
This guide walks through the five common causes of blurry photos and exactly how to fix each one. If you are learning photography in order, our photography basics guide puts troubleshooting after the core skills. This is the diagnostic manual for when shots come out soft.

Cause 1: Camera Shake
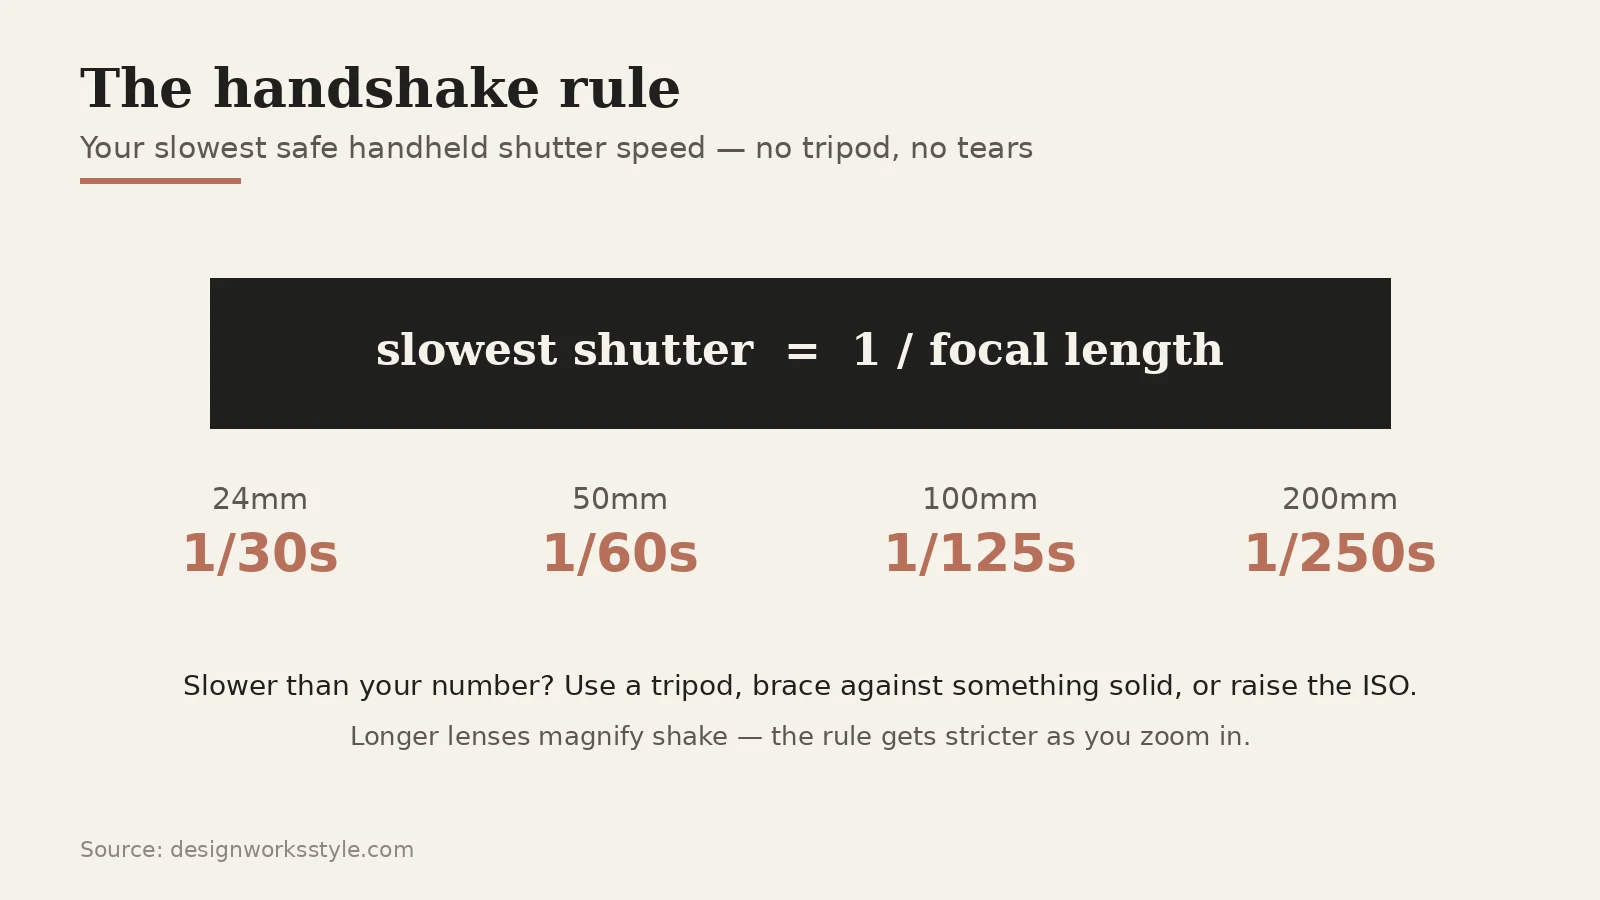
Camera shake blurs everything in the frame, including things that were not moving, because your hands moved during the exposure. The fix is a faster shutter speed: follow the handheld rule and do not shoot slower than 1/focal length (1/50s for a 50mm lens).
The 1/focal length rule deserves a proper explanation because it saves more photos than any other single guideline. A longer lens magnifies everything, including your hand tremor, so the longer the focal length, the faster the shutter needs to be. At 24mm you can often handhold 1/30s; at 200mm you need 1/200s or faster. On crop-sensor cameras, multiply the focal length by the crop factor first (a 50mm lens on a 1.5x crop body behaves like 75mm, so your floor is 1/80s).
Image stabilization helps. Modern lenses and bodies give you 3 to 5 extra stops, meaning that 1/50s floor might stretch to 1/15s. But stabilization fixes your shake, not your subject’s movement, and it has limits. Treat it as a bonus, not a plan.
When the light will not allow a fast enough shutter, you have options before reaching for a tripod. Raise the ISO (a sharp noisy photo beats a clean blurry one), open the aperture to its widest, or brace yourself: elbows tucked, camera pressed to your face, exhale before firing, or lean against a wall. For truly slow exposures, nothing beats a tripod, but a bag on a railing or the camera’s 2-second timer on any solid surface works surprisingly well.
Cause 2: Subject Movement
When the background is sharp but the subject, a person, a pet, a car, is smeared, the subject moved during the exposure. The fix is a faster shutter speed matched to the action: 1/250s for walking people, 1/500s–1/1000s for kids and sports, 1/2000s and up for birds or motorsports.
Switch to Shutter Priority mode (S or Tv on the mode dial) so you control the freeze directly and the camera handles the rest. This is the mode sports and wildlife photographers live in. Set your minimum acceptable speed for the subject, and let the camera open the aperture or raise the ISO to keep up. That is exactly what the mode is for.
There is also the creative option: pan with the subject. Track a moving cyclist or car with your camera, firing at a moderate speed like 1/60s. The subject stays relatively sharp while the background streaks. Motion rendered as energy instead of accident. It takes practice (expect a low hit rate at first), but panning turns a technical limitation into a technique. Our shutter speed guide covers the full range from freezing to intentional blur.
Cause 3: Missed Focus
Missed focus means something is sharp, but it is the wrong thing: the background behind your subject, or the nose instead of the eyes. The fix is taking control of the focus point instead of letting the camera choose. Use single-point autofocus, place it on the most important detail (usually the nearest eye in a portrait), and confirm before firing.
Most missed-focus shots come from letting the camera pick from all its focus points. It reliably chooses the closest high-contrast object, which is often not your subject. Switch to a single point or a small zone and put it where it matters. For still subjects, that is enough. For moving subjects, switch to continuous autofocus (AF-C) so the camera tracks as the distance changes; single-shot AF on a running child will miss every time.
Also check your aperture before blaming focus. At very wide apertures (f/1.4–f/2), depth of field is razor-thin. If one eye is sharp and the other is not, that is not missed focus, that is physics. Stop down to f/2.8–f/4 for a margin of safety, especially in portraits. And avoid focus-and-recompose at wide apertures: locking focus then rotating the camera shifts the focal plane enough to miss.

Cause 4: Too-Slow Settings in Low Light
Indoor and evening photos go soft because low light forces bad compromises. The camera drops the shutter speed to gather light, and shake blurs the result. Choose your compromises deliberately: raise the ISO, open the aperture to its widest, and add light, instead of letting auto mode pick a slow shutter.
Start with ISO. Modern cameras handle 3200 far better than beginners expect, and even phones produce usable images at high ISO now. A sharp noisy photo beats a clean blurry one every time. Noise can be reduced in editing; blur cannot be undone. Do not cap your auto ISO at 800 out of fear; let it climb to 3200 or 6400 before the shutter drops below your handheld floor.
Next, open the aperture all the way and add light. Move near a window, turn on a lamp, step into the brighter part of the room. Our lighting guide covers working with available light in detail. Phone shooters: night mode is genuinely good now. It stacks multiple exposures to beat shake, but it needs a still scene and a steady hand for a second or two. Flash is a last resort, not a first one.
Cause 5: Dirty Lens or Wrong Expectations
A general haze or softness in all conditions, not motion blur, just a permanent soft glow, usually means a dirty lens. A fingerprint on a phone lens ruins more photos than any setting ever has. Wipe it with a microfiber cloth (not your shirt, which just smears), and check again before changing anything else.
The other half of this cause is expecting more than the gear can deliver. Heavy digital zoom, extreme cropping, and shooting through windows all soften images no setting can rescue. Digital zoom is just cropping with extra steps. Walk closer instead. And judge sharpness at normal viewing sizes, not pixel-peeping at 100%. Every photo looks soft magnified four times. Judge by the print or the screen at normal size. That is how the photo will actually be seen.
The 30-Second Diagnostic
Run this checklist the next time a shot comes out soft, before the moment passes. Each symptom maps to one cause above. Everything blurred means camera shake. Subject-only blur means too-slow shutter. Wrong-thing-sharp means focus error. Low-light-only softness means raise the ISO. Permanent haze means clean the lens.
- Everything blurred? Camera shake. Faster shutter, higher ISO, or brace/tripod.
- Only the subject blurred? Subject movement. Faster shutter speed, Shutter Priority mode.
- Wrong thing sharp? Missed focus. Single-point AF on the key detail; stop down if aperture is very wide.
- Only bad in low light? Raise ISO, open aperture, add light. Do not let auto pick a slow shutter.
- Always hazy? Clean the lens with microfiber. Check digital zoom and extreme crops.
Frequently Asked Questions
Why are my photos blurry even in daylight?
Usually missed focus or subject movement. Check where the camera actually focused, and make sure your shutter speed suits the subject’s speed.
Can you fix a blurry photo after taking it?
Slightly. Sharpening tools can improve mild softness. But heavy motion blur or missed focus cannot be genuinely recovered. Get it right in camera.
Does a better camera fix blurry photos?
Rarely. Blur comes from technique and settings, not gear. A beginner with a phone who understands shutter speed out-shoots a novice with a flagship camera on auto.
Why are my phone photos blurry at night?
Low light forces slow shutter speeds and high ISO. Use night mode, brace the phone against something solid, keep the scene still for the capture, and wipe the lens first. Night shots magnify every smudge. If it is still blurry, add light: step near a lamp or storefront.
Blurry photos are a diagnostic, not a mystery. Run the 30-second check next time a shot comes out soft, and you will fix it before the moment passes.