

Light is the raw material of photography. The camera just records it. Before settings, before composition, the quality, direction, and color of light decide what your photo feels like. Learn to see light first, and every other skill gets easier, because good light forgives bad settings and bad light punishes good ones.
This guide covers the essentials: hard versus soft light, why golden hour flatters everything, how light direction shapes mood, how to use a window as a free studio, and what to do when the sun is harsh and uncooperative. If you are learning in order, our photography basics guide puts light before everything else for a reason.
Hard Light vs. Soft Light
Every lighting situation comes down to one distinction. Hard light from a small source makes sharp-edged shadows and strong contrast, while soft light from a large source melts shadows into gentle gradients. Hard light creates drama; soft light flatters faces. Learn to tell them apart and you can predict any scene.
- Hard light comes from a small source relative to the subject: direct midday sun, a bare bulb, a phone flash. It creates sharp-edged shadows, strong contrast, and drama. Great for texture and mood; unforgiving on faces, where every pore and wrinkle gets emphasized.
- Soft light comes from a large source: an overcast sky, a north-facing window, a shaded wall bouncing sunlight. Shadows melt into gentle gradients. Flattering for people, forgiving for beginners, and the reason cloudy days are secretly excellent.
The rule of thumb: bigger source = softer light. That is why cloudy days are nature’s softbox and why photographers chase shade at noon. But there is a second half to the rule most beginners miss: closer = softer too. A window two feet from your subject is a huge, soft source; the same window across the room is small and hard by comparison. Move your subject closer to the light and watch the shadows soften in real time.
The Golden Hour
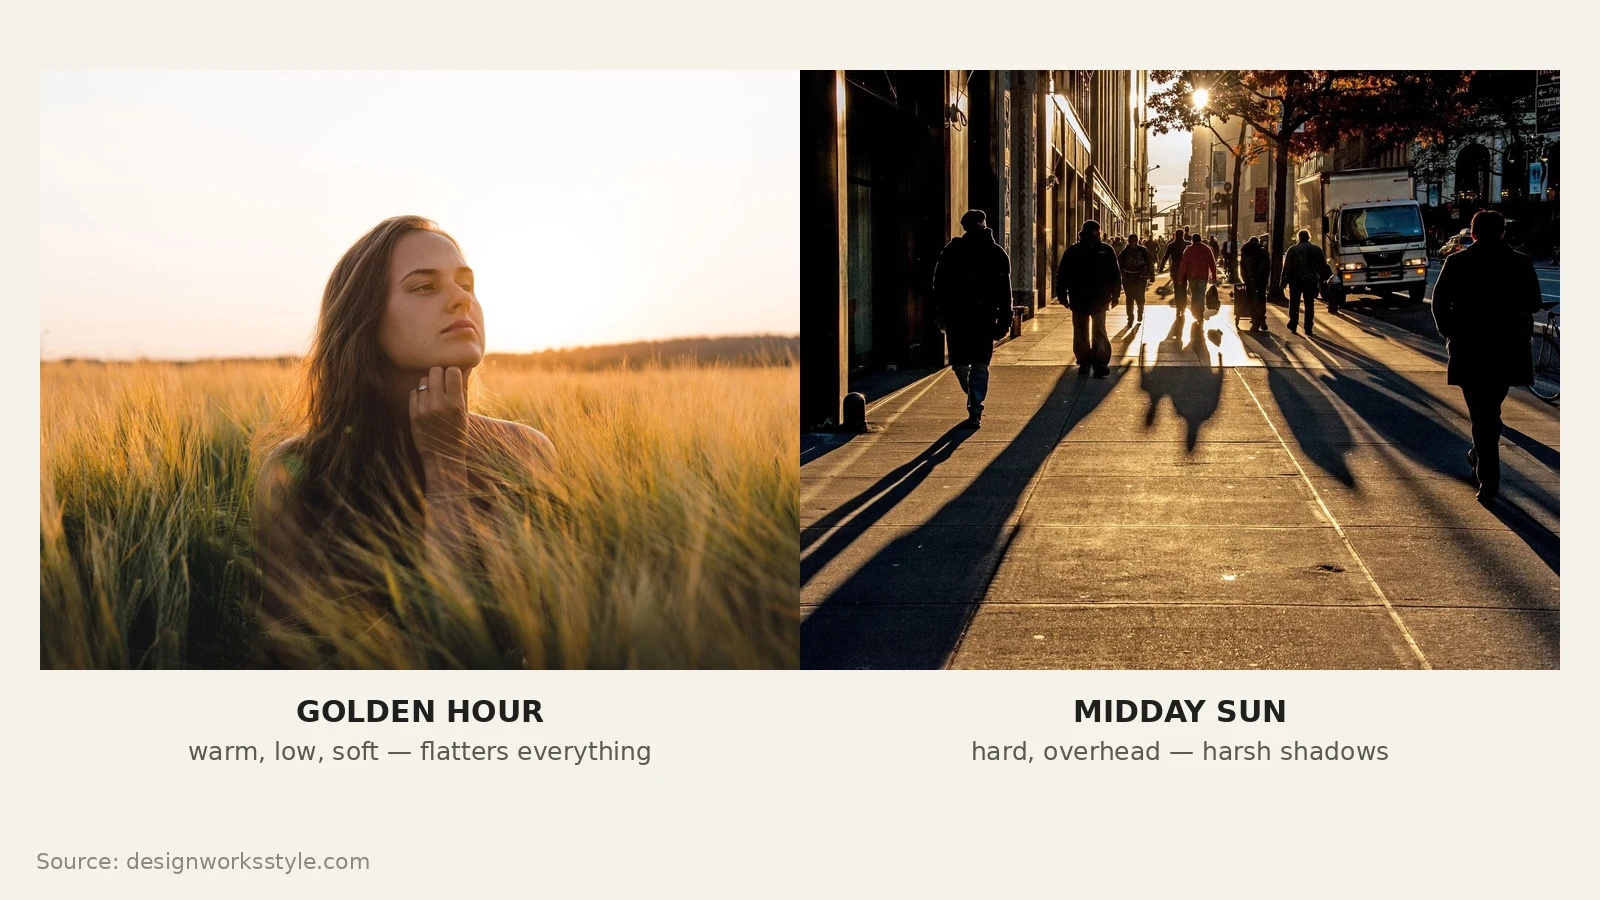
The golden hour, roughly the hour after sunrise and the hour before sunset, gives you warm, low-angled, naturally soft light. Long shadows add depth, skin tones glow, and landscapes look three-dimensional without any effort from you. It is popular because it is forgiving: the light does the styling, so even simple compositions look good.
The warmth is physics. Sunlight travels through more atmosphere at a low angle, which scatters away the blue wavelengths and leaves gold and amber. The low angle sculpts. Raking light reveals texture that overhead sun flattens.
Plan for it rather than hoping for it. The golden hour’s real length varies: closer to 40 minutes near the equator, stretching past two hours at high latitudes in summer. Arrive 30 minutes early, shoot both toward the sun (backlit glow, long shadows toward camera) and away from it (warm front light on faces). The same hour gives you two completely different looks.
Do not pack up when it ends. The blue hour, the twilight just after sunset, trades the warmth for cool, even tones that suit cityscapes and moody portraits. Streetlights and windows turn on while the sky still holds color, and that combination is worth staying for.
Direction Matters More Than You Think
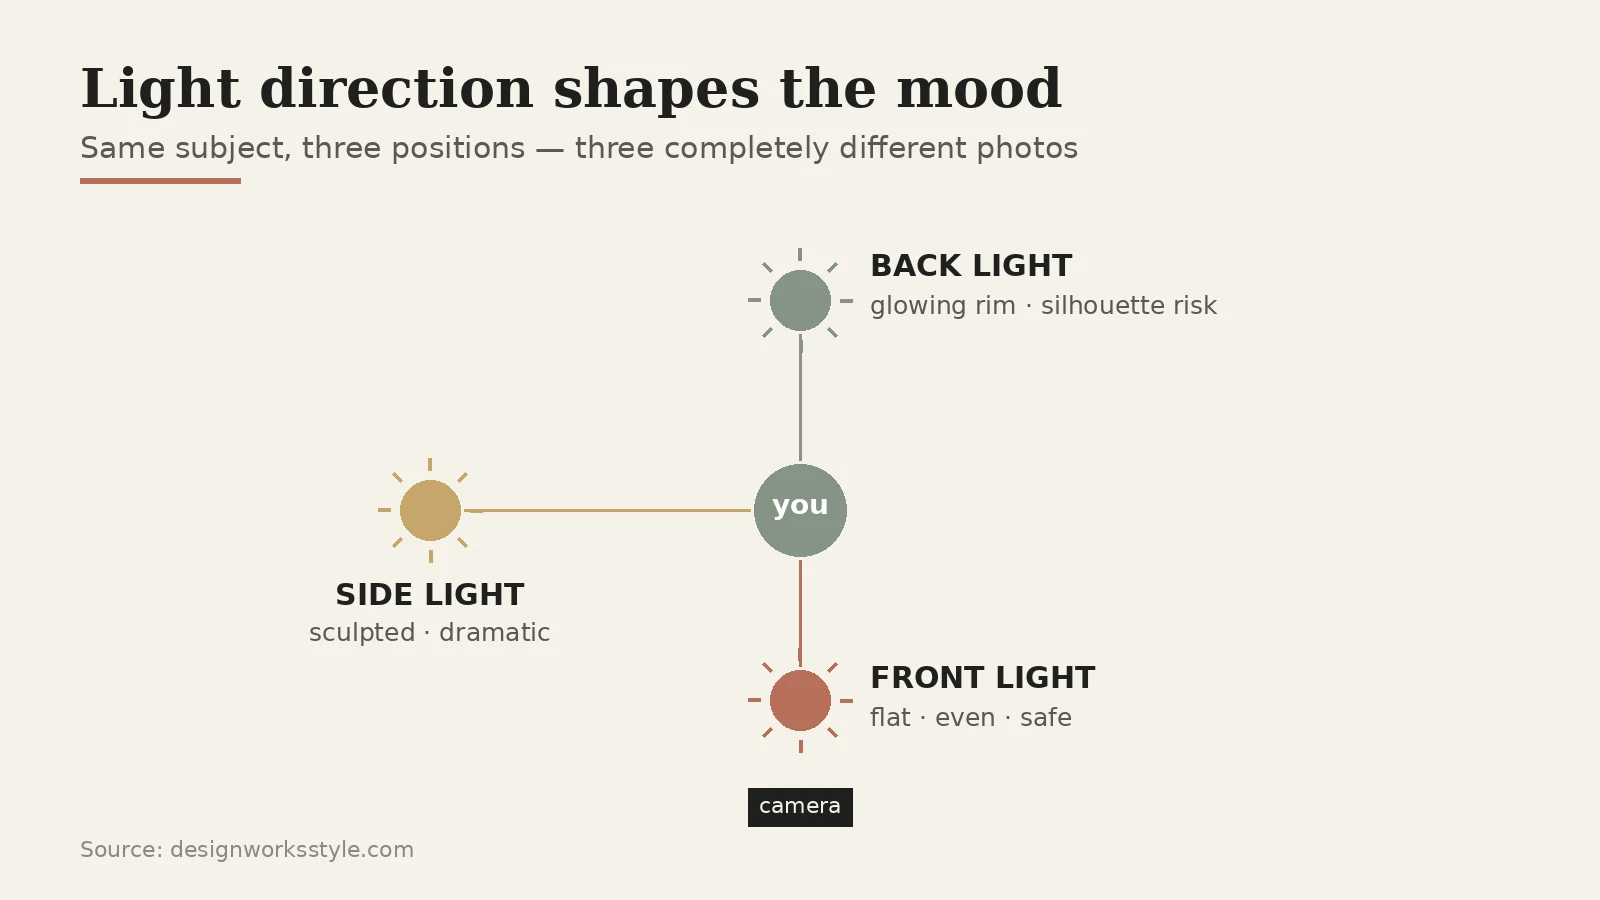
Light direction shapes mood more than most beginners realize. Front light flattens and feels safe, side light sculpts and reveals texture, backlight glows and silhouettes. The same subject photographed from three directions looks like three different photos. Once you see this, you stop asking “is the light good?” and start asking “where is it coming from?”
- Front light (sun behind you) is flat and safe: everything evenly lit, minimal shadows. Fine for documentation and group snapshots, dull for drama. Faces look two-dimensional because there are no shadows to model their shape.
- Side light rakes across the subject, revealing texture and shape. A face half-lit by a window has dimension a front-lit face never will. This is the portrait photographer’s default: position your subject so the window is to their side, not in front of them.
- Backlight (sun behind the subject) creates rims of glowing hair, haze, and silhouettes. Expose for the subject’s face and let the background blow out, or expose for the sky and embrace the silhouette. Either choice is valid; indecision is what ruins backlit shots.
Photograph the same subject from three directions. The difference will permanently change how you look at light. You will start moving subjects, or yourself, to get the direction you want.
Window Light: Your Free Studio
A large window is the best portrait light most beginners will ever use, and it costs nothing. Place your subject a few feet from the window, facing it at a slight angle, and you get soft, directional light that flatters every face. Portrait studios spend thousands recreating exactly what a north-facing window does for free.
Distance is your dimmer switch. Close to the window (three to four feet), light falls off quickly across the face and creates dimension; farther back, it evens out and flattens. The bigger the window relative to the face, the softer the light, which is why floor-to-ceiling windows are a portrait photographer’s dream.
Two practical rules. First, turn off overhead room lights. They add ugly color casts that fight the clean daylight (more on mixed light below). Second, sheer curtains turn an already good window into a great one by diffusing the source even larger. And if the shadow side goes too dark, bounce light back with anything white: a poster board, a bedsheet, even a white wall. Reflectors do not need to be purchased.

Overcast Days Are a Gift
An overcast sky is a giant softbox: no harsh shadows, no squinting, colors render rich and even. Beginners curse cloudy days; experienced photographers book shoots on them. Portraits, flowers, street scenes, all easier under clouds, because the light needs no management and you can shoot in any direction.
Colors look better under clouds. Without harsh highlights, reds stay red and greens stay deep, which is why garden photography thrives on overcast days. And if you wake to fog, go shoot immediately. It is the ultimate softbox and it rarely lasts.
The trade: skies photograph as flat white, and overcast light can feel directionless, everything evenly lit, nothing sculpted. Compose to minimize blank sky (tilt down, use tree canopies as natural ceilings), or embrace the minimalism. And add direction yourself when you want it: a reflector or even a phone flashlight from the side reintroduces the modeling that clouds erase.
Surviving Harsh Midday Sun
Sometimes you cannot choose the hour. When the sun is high and hard, you have three moves: find open shade, put the sun behind your subject, or embrace the harshness as a style. Each works. Standing your subject in direct overhead sun and hoping for the best does not.
- Find open shade. A building’s shadow, a tree canopy, an awning. Shade is soft light, and your subject’s eyes will thank you. Watch for color casts: green trees tint skin green, red walls tint it red. Neutral surroundings are safest.
- Put the sun behind your subject. Backlight at noon still beats squinting into the sun, and hair glows beautifully. Watch your exposure: the camera will want to underexpose the face against the bright background, so add positive exposure compensation.
- Embrace the harshness. Hard shadows suit architecture, street photography, and black-and-white work, where graphic contrast is the point. Not every photo needs to flatter. Midday sun on weathered wood or city geometry can be spectacular.
The Color of Light
Light has a color temperature, and it changes constantly: golden hour is warm amber, open shade is cool blue, household bulbs are orange, office fluorescents are green. Your camera’s white balance tries to neutralize these casts, but mixed lighting, daylight from a window plus tungsten lamps, for instance, confuses it, and no single setting fixes both.
Match white balance to the dominant light and eliminate the competition. Turn off lamps when shooting by window light. When you cannot, simplify: fewer light sources, cleaner color.
Shooting in RAW makes white balance fully reversible later. JPEG shooters: learn what each preset does (cloudy warms, tungsten cools indoor orange) and set it deliberately instead of leaving everything on auto.
Common Lighting Mistakes
The lighting mistakes beginners repeat are dappled light on faces, a background far brighter than the subject, on-camera flash used as the main light, and forgetting that the background needs light too. Each comes from the same root cause: looking at the subject but not at the light.
- Dappled light. Sun filtering through leaves paints leopard spots on faces: bright blobs and dark holes no editing fixes gracefully. Move fully into shade or fully into sun; the in-between is where portraits go to die.
- Blown-out backgrounds. A perfectly exposed face against a white, detail-free sky means the background was stops brighter than the subject. Reposition so the background is in similar light to the subject, or expose for the background and add fill light on the face.
- Flash as the main light. Direct on-camera flash flattens faces and blacks out backgrounds. Bounce it off a ceiling if you must, or better, find real light first.
A Simple Practice Exercise
Photograph one willing subject, a person, a pet, even a houseplant, in direct sun, open shade, and beside a large window. Compare shadow edges, skin texture, and catchlights. One subject, three lights, three moods. After this, you will never again shoot without first asking where the light is coming from.
- Pick a willing subject: a person, a pet, even a houseplant.
- Photograph them in direct sun, in open shade, and beside a large window. Keep the composition similar so light is the only variable.
- Compare the three side by side: shadow edge hardness, skin texture, catchlights, background brightness.
- Repeat at golden hour. Notice how the same three setups transform when the sun drops.
Frequently Asked Questions
What is the best light for photography?
Soft, directional light: golden hour outdoors or a large window indoors. It flatters subjects and forgives mistakes.
What is golden hour in photography?
The roughly one hour after sunrise and one hour before sunset, when sunlight is warm, low, and soft, ideal for portraits and landscapes.
How do I take good photos in harsh sunlight?
Move into open shade, backlight your subject, or lean into the drama with high-contrast black and white.
Should I use flash for indoor portraits?
Only as a last resort. Window light almost always looks better than direct flash. If you must use flash, bounce it off a white ceiling or wall to enlarge the source. Direct on-camera flash is what creates the flat, harsh look everyone dislikes.
See the light before you touch the camera: hard or soft, which direction, what color? Chase golden hour, befriend windows and overcast skies, and have a plan for harsh noon. Do the three-light exercise once and lighting stops being luck.